Step by Step Invoicing Guide


Jump to Section:


Section One: Entering Subcontractor SSOV

After your contract is executed via Docusign, you'll be able to start the billing process.

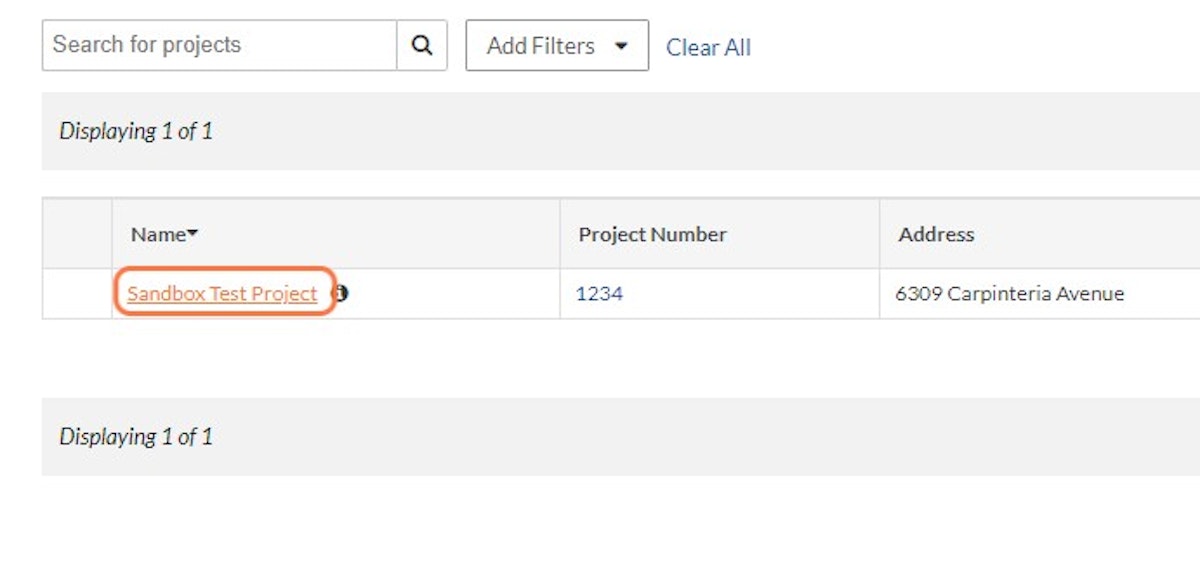
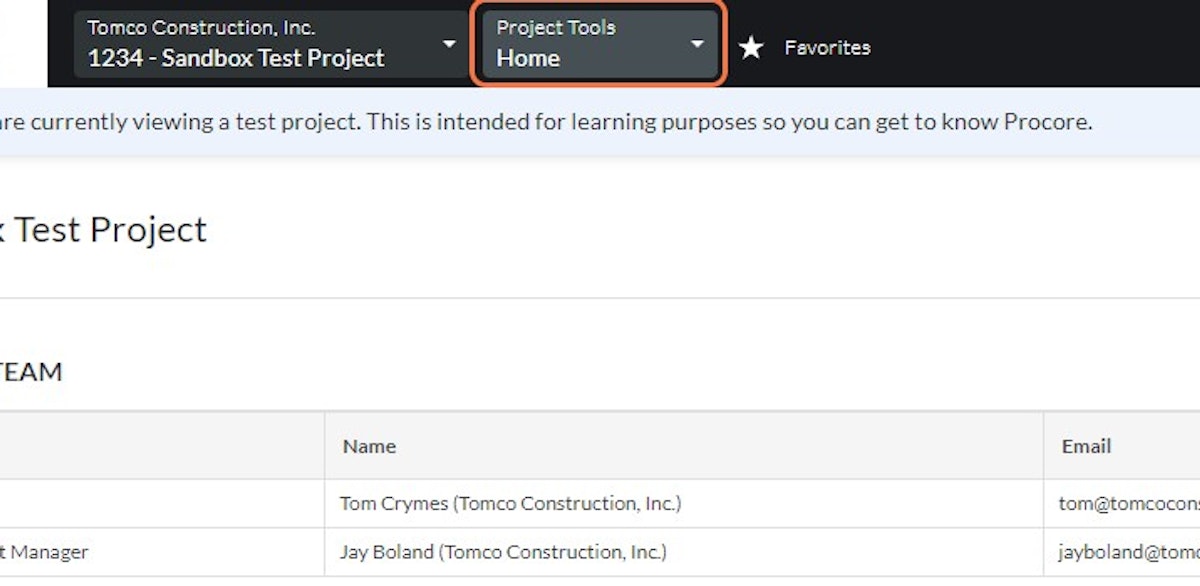
1. Go to Procore, clicking on Tomco's Portfolio

2. Click on The Project You'd Like to Bill

Step 3 screenshot

3. Click on Project Tools…

Step 4 screenshot

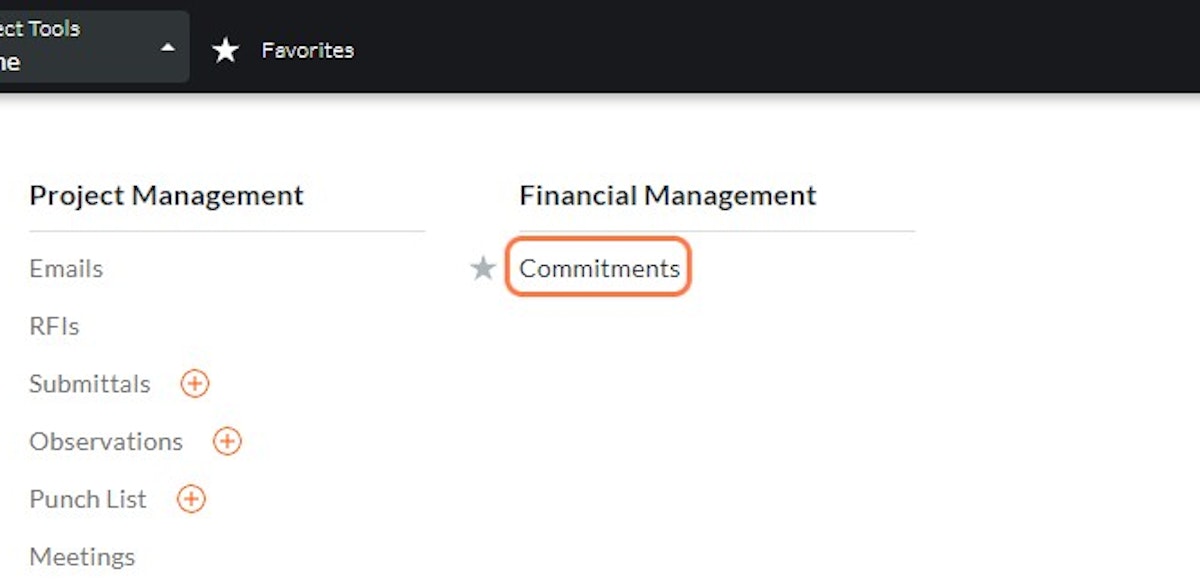
4. Click on Commitments

Step 5 screenshot

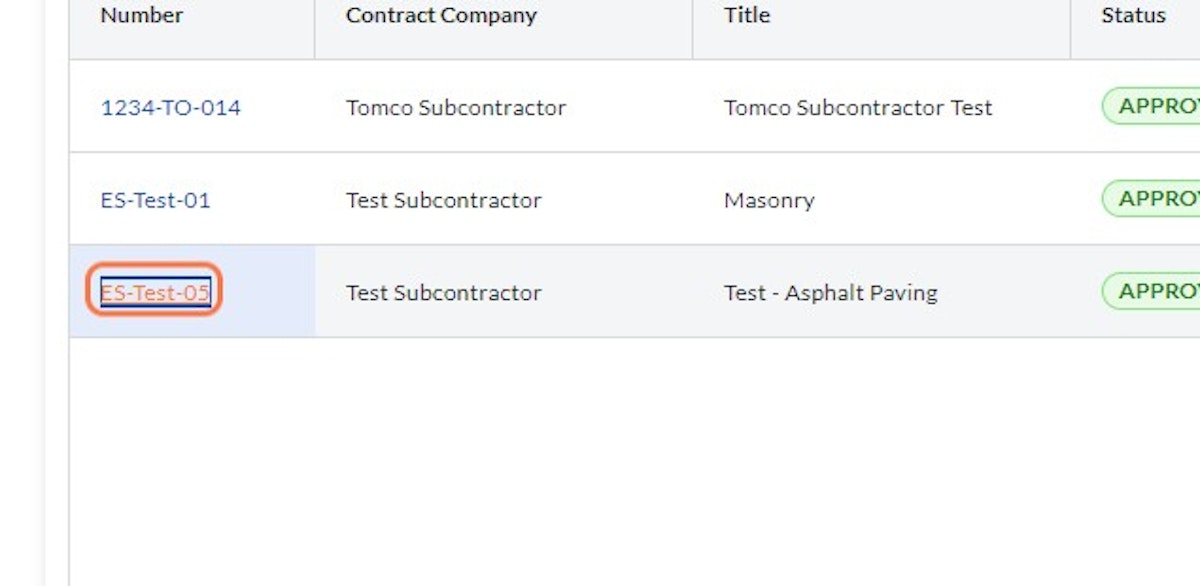
5. Click on Your Subcontract Number

Step 6 screenshot

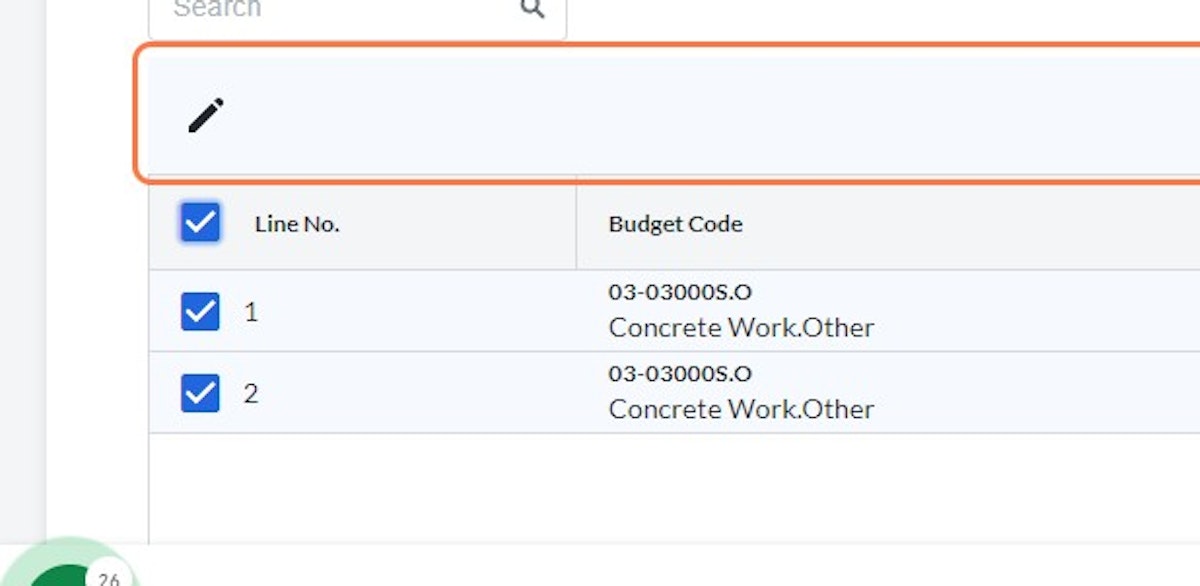
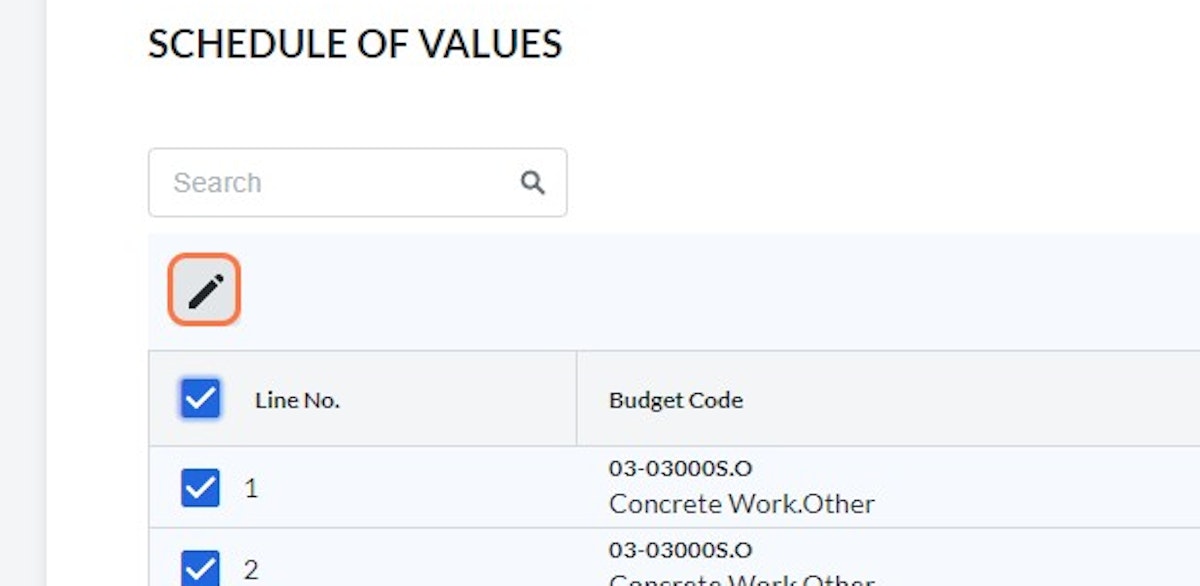
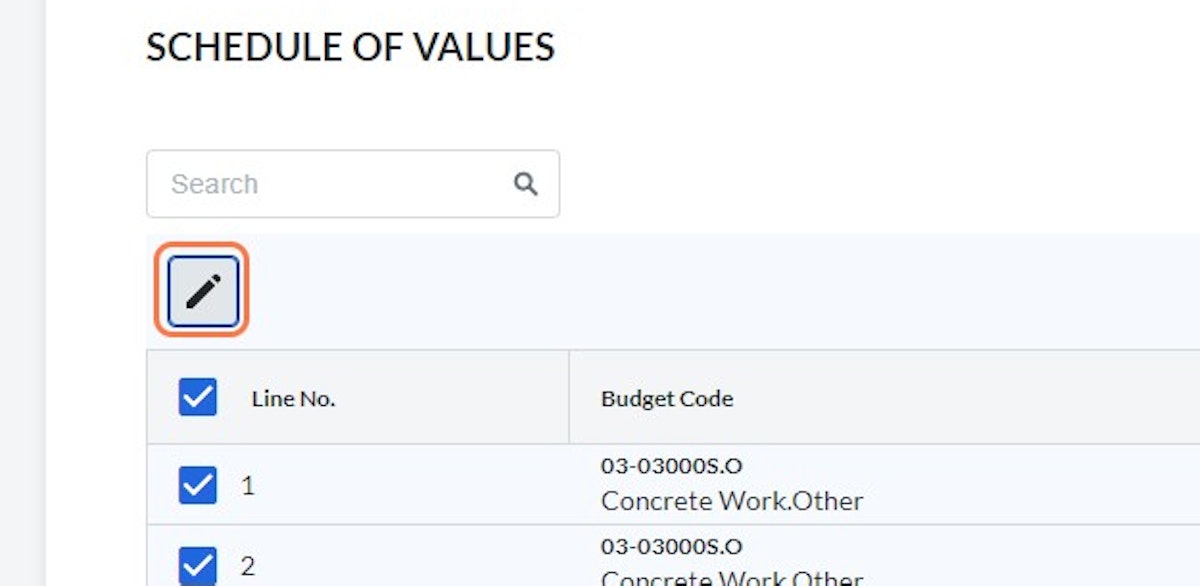
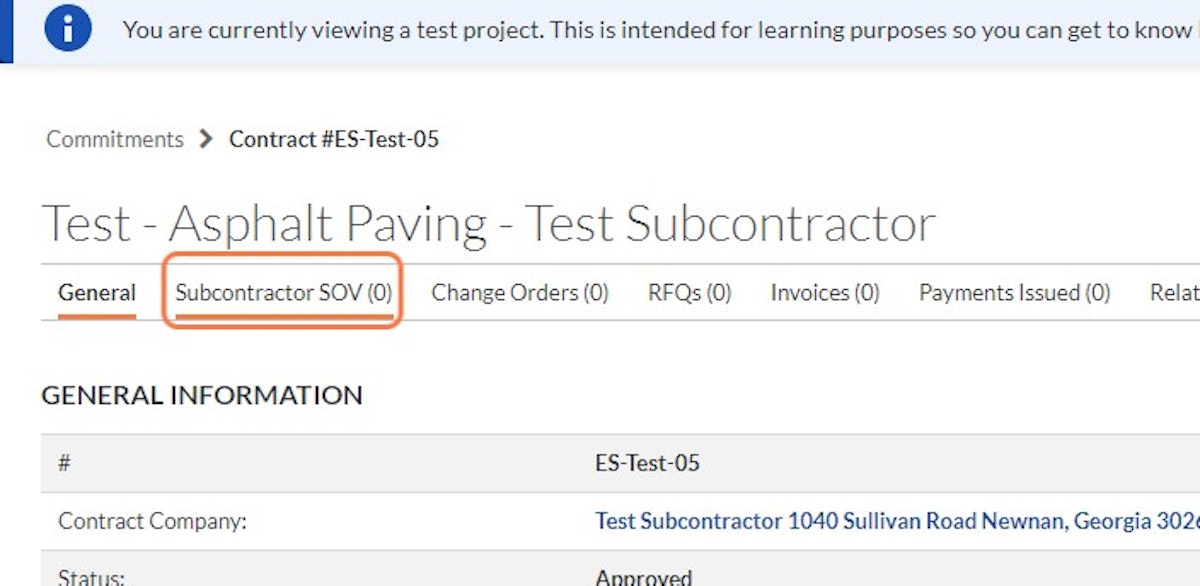
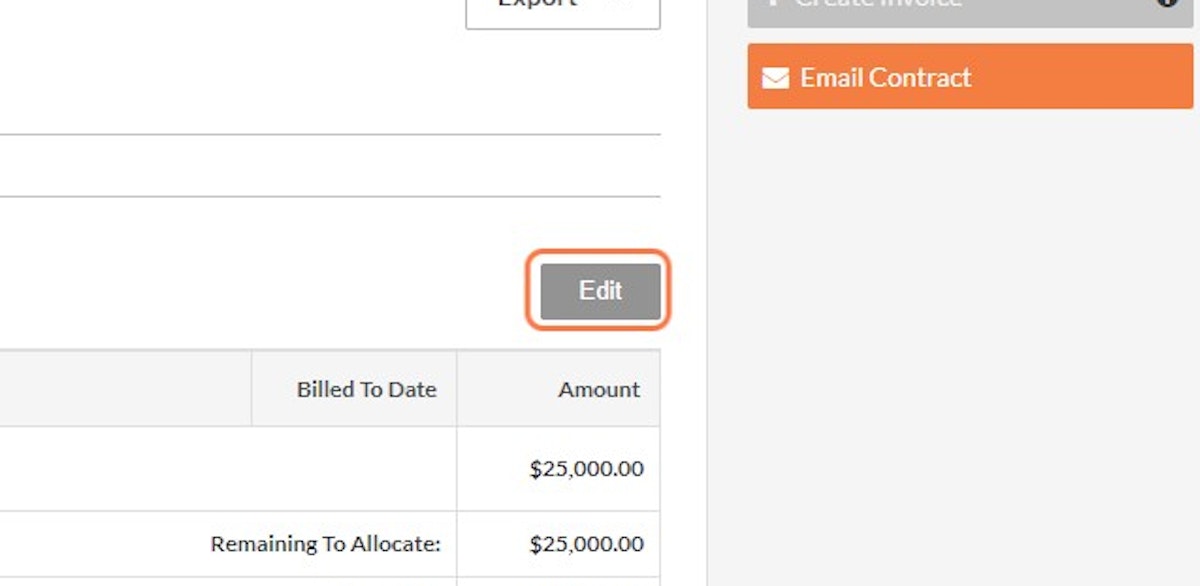
6. Click on Subcontractor SOV

You must complete this step before you're allowed to invoice!
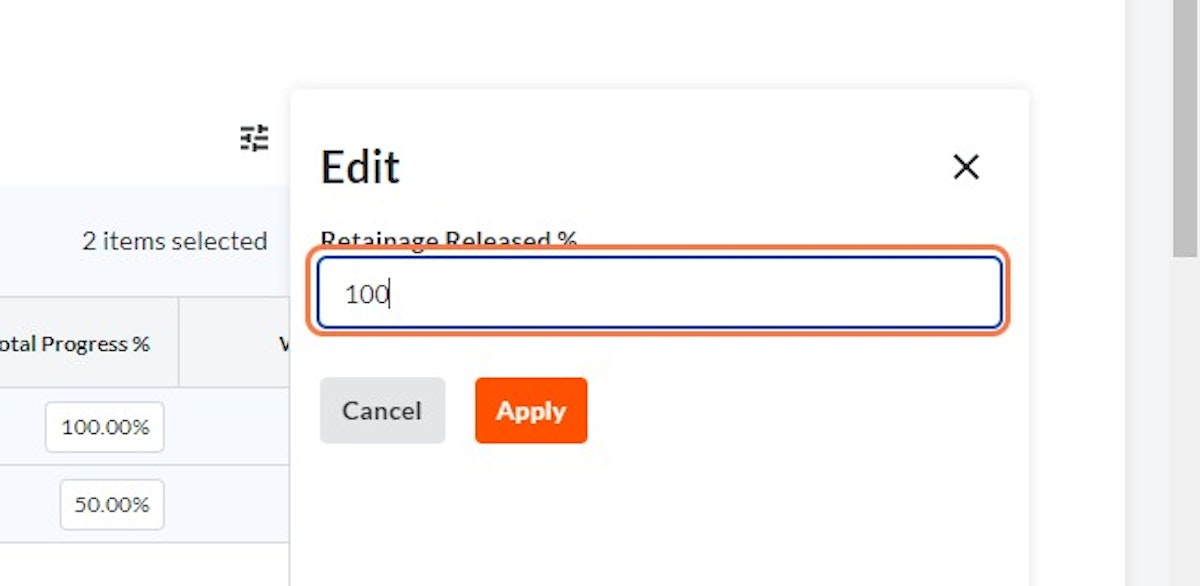
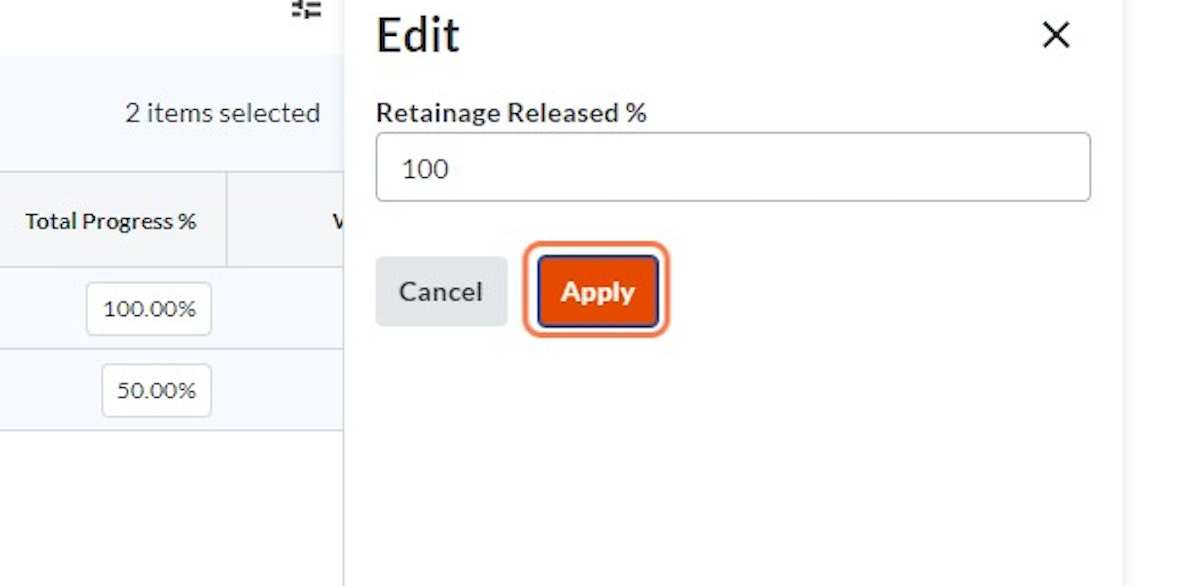
 Step 7 screenshot

7. Click on Edit

Step 8 screenshot

8. Click on + Add Line

Step 9 screenshot

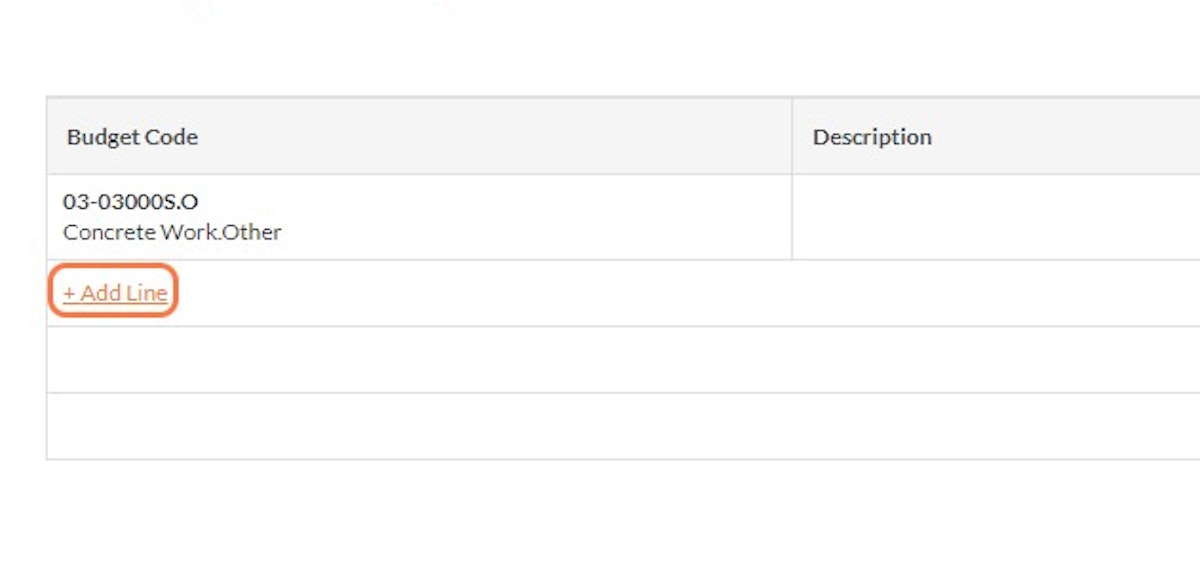
9. Type Your Detailed SOV Line Items

For this example, I've split costs between material and labor. Step 10 screenshot

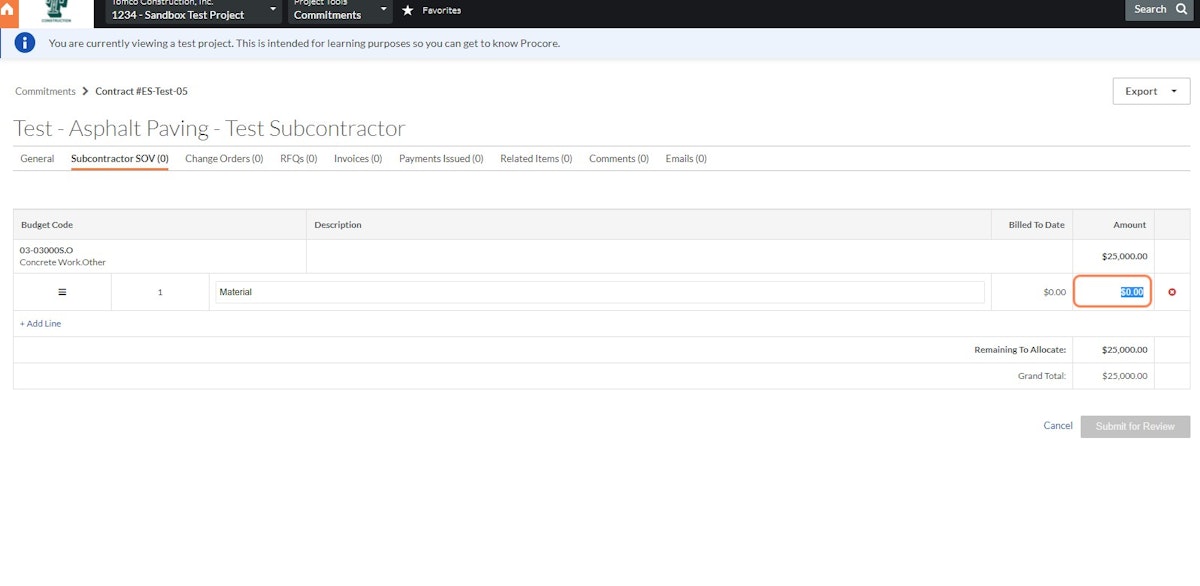
10. Type the SOV Value

Step 11 screenshot

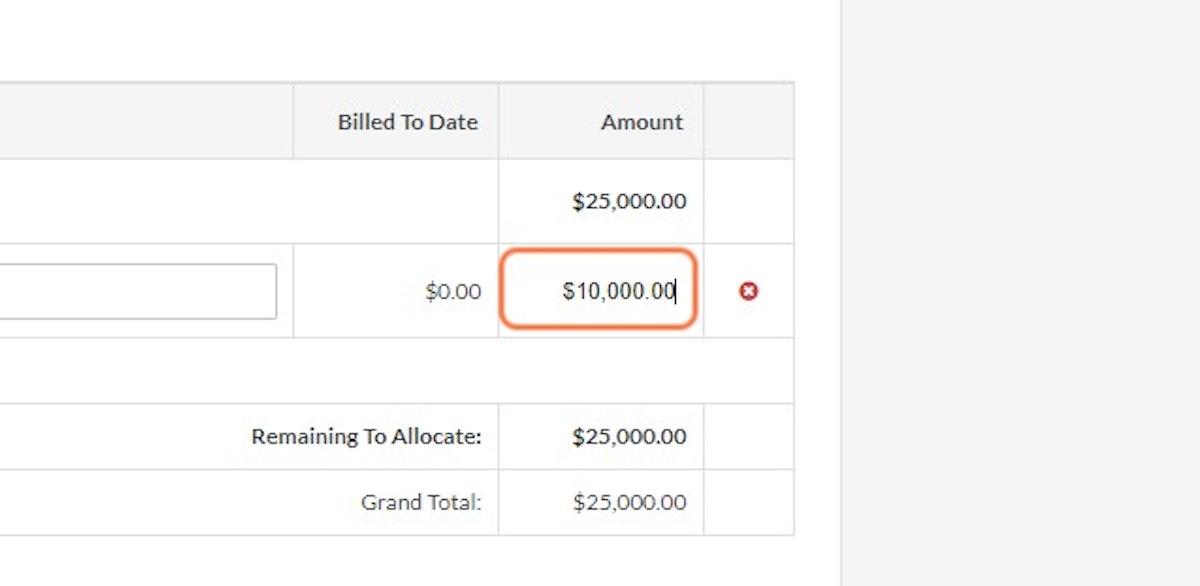
11. Optional: Add More SSOV Line Items and Values

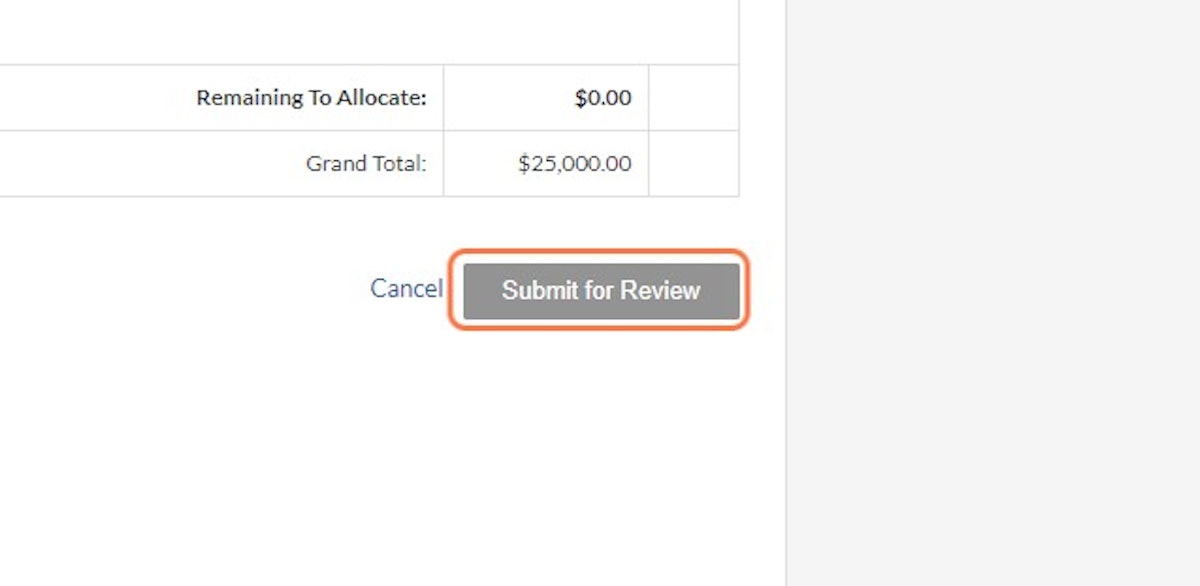
12. Click on Submit for Review

Step 13 screenshot

13. Allow Project Management Team Time to Approve Your SSOVS


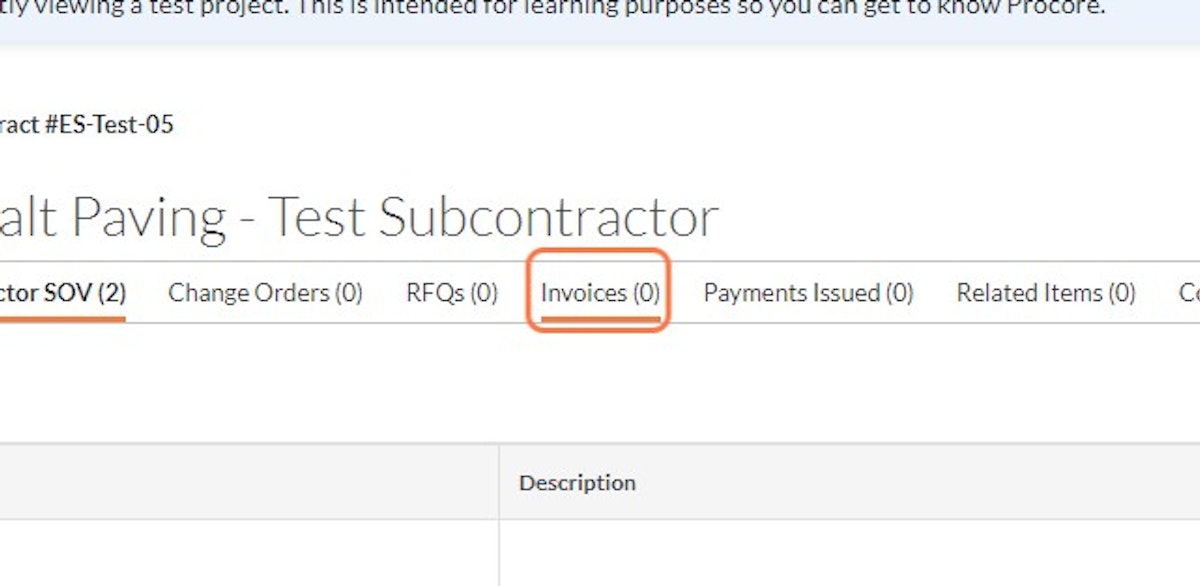
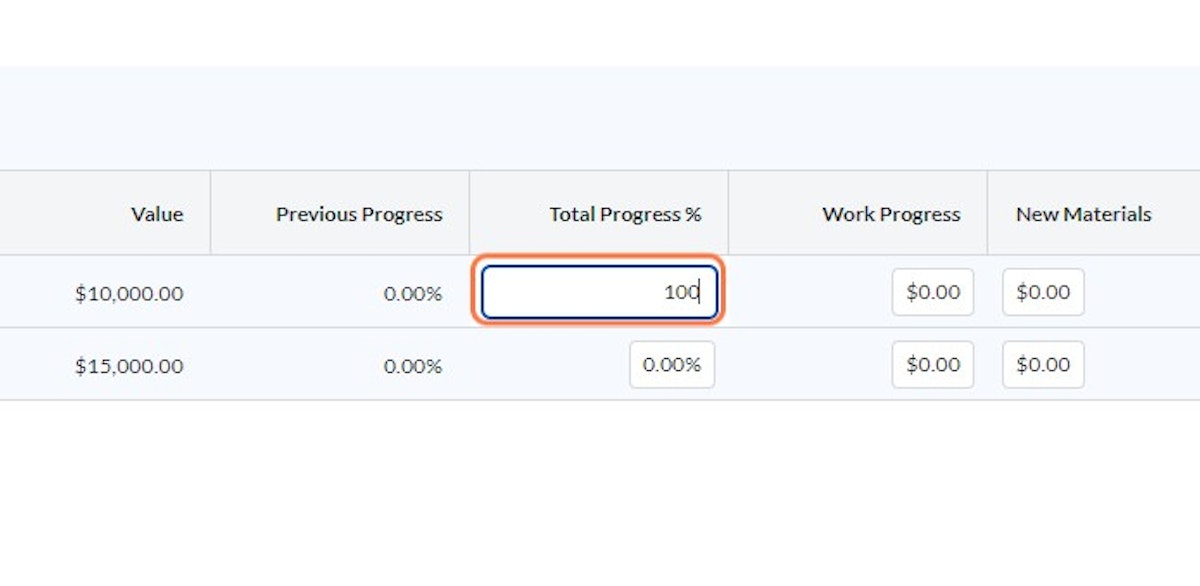
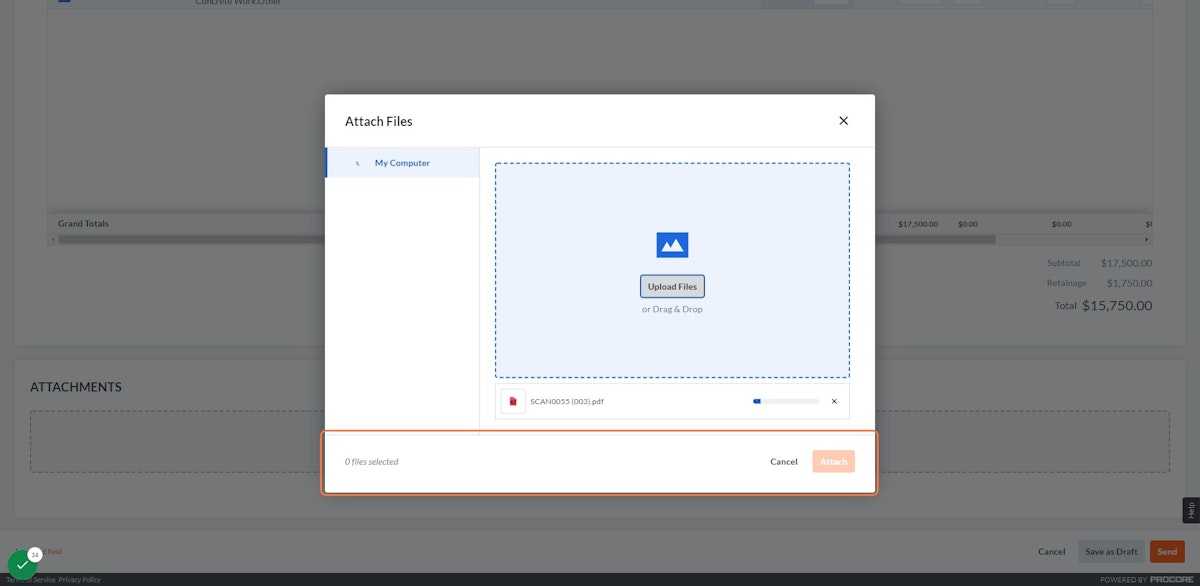
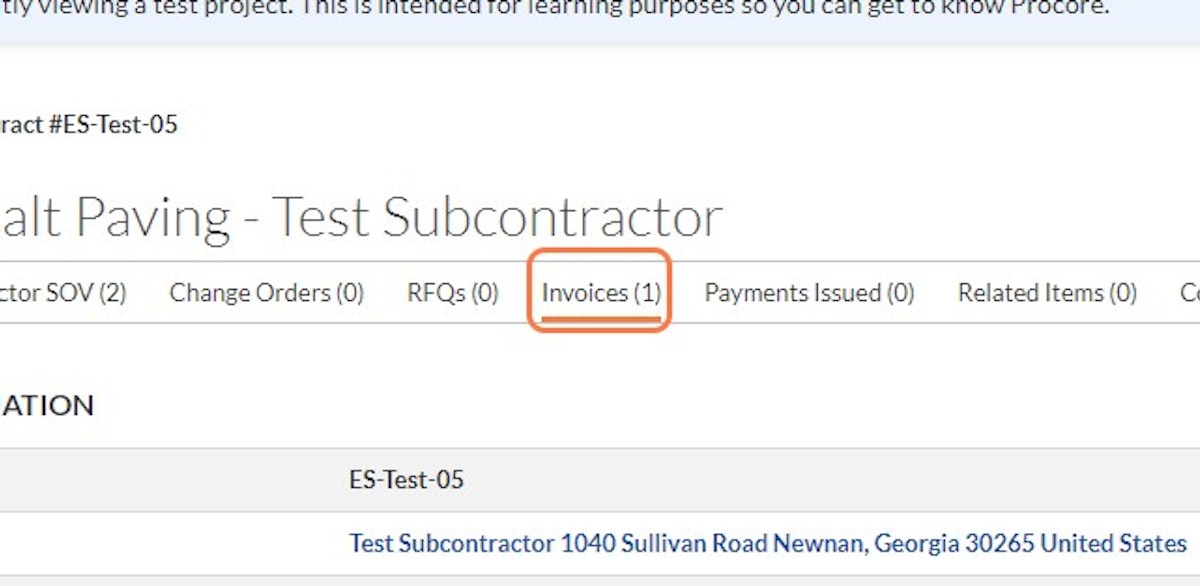
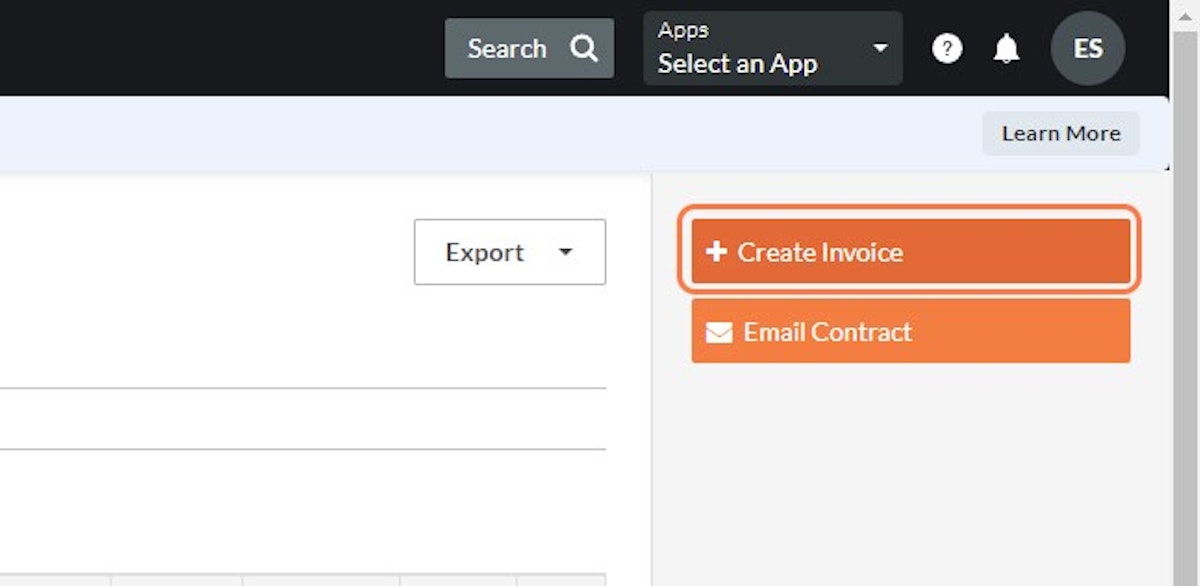
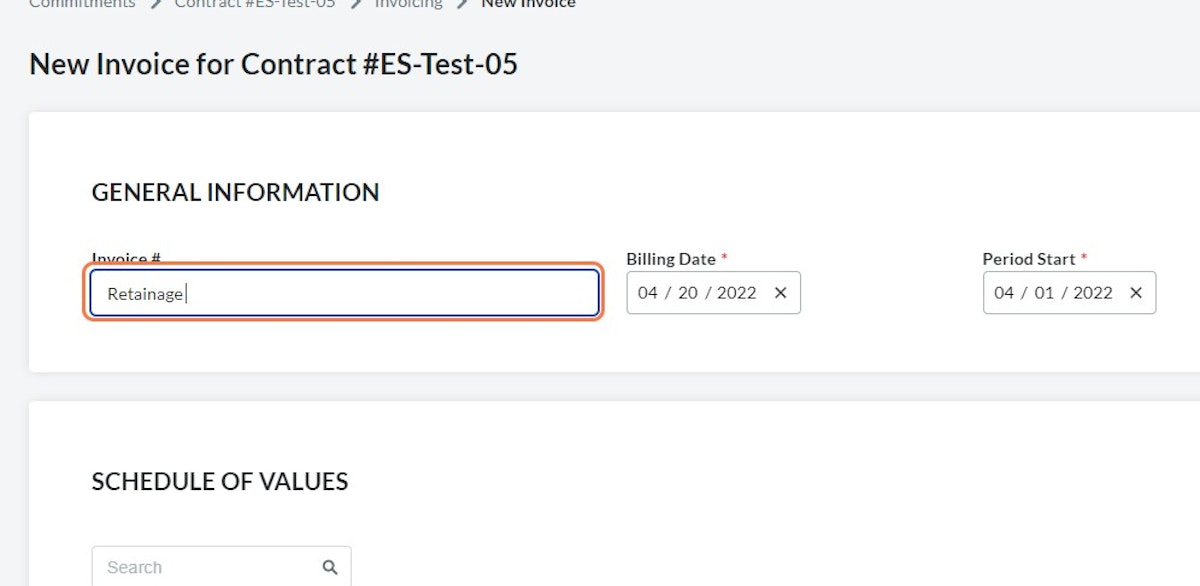
Section Two: Submitting an Invoice

1. Click on Invoices

You can complete this step once SSOV's are approved Step 16 screenshot

2. Click on Create Invoice

Step 17 screenshot

3. Type Your Invoice Number

Step 18 screenshot

4. Select Line Items You Want to Bill For

Step 19 screenshot

5. Click on "Total Progress" Box Value

Step 20 screenshot

6. Input Progress % Complete

Step 21 screenshot

7. Attach Lien Waivers using the Attach Files Tool

Step 22 screenshot

8. Click on Upload Files

Step 23 screenshot

9. Select your file from file upload menu

Step 24 screenshot

10. Click on Attach

Step 25 screenshot

11. Click on Send

Step 26 screenshot


Section Three: Requesting Retainage Release

1. Click on Invoices

Step 28 screenshot

2. Click on Create Invoice

Step 29 screenshot

3. Type "Retainage "

Step 30 screenshot

4. Check All Rows

Step 31 screenshot

5. Click on Pencil Tool

Step 32 screenshot

6. Type "100"

Step 33 screenshot

7. Click on Apply

Step 34 screenshot

8. Attach Final Lien Waiver: Click on Attach Files

Step 35 screenshot

9. Click on Upload Files

Step 36 screenshot

10. Select your Final Lien Waiver from file upload menu

Step 37 screenshot

11. Click on Attach

Step 38 screenshot

12. Click on Send

Step 39 screenshot